How to Make DIY Christmas Centerpieces That Look Bougie for Less
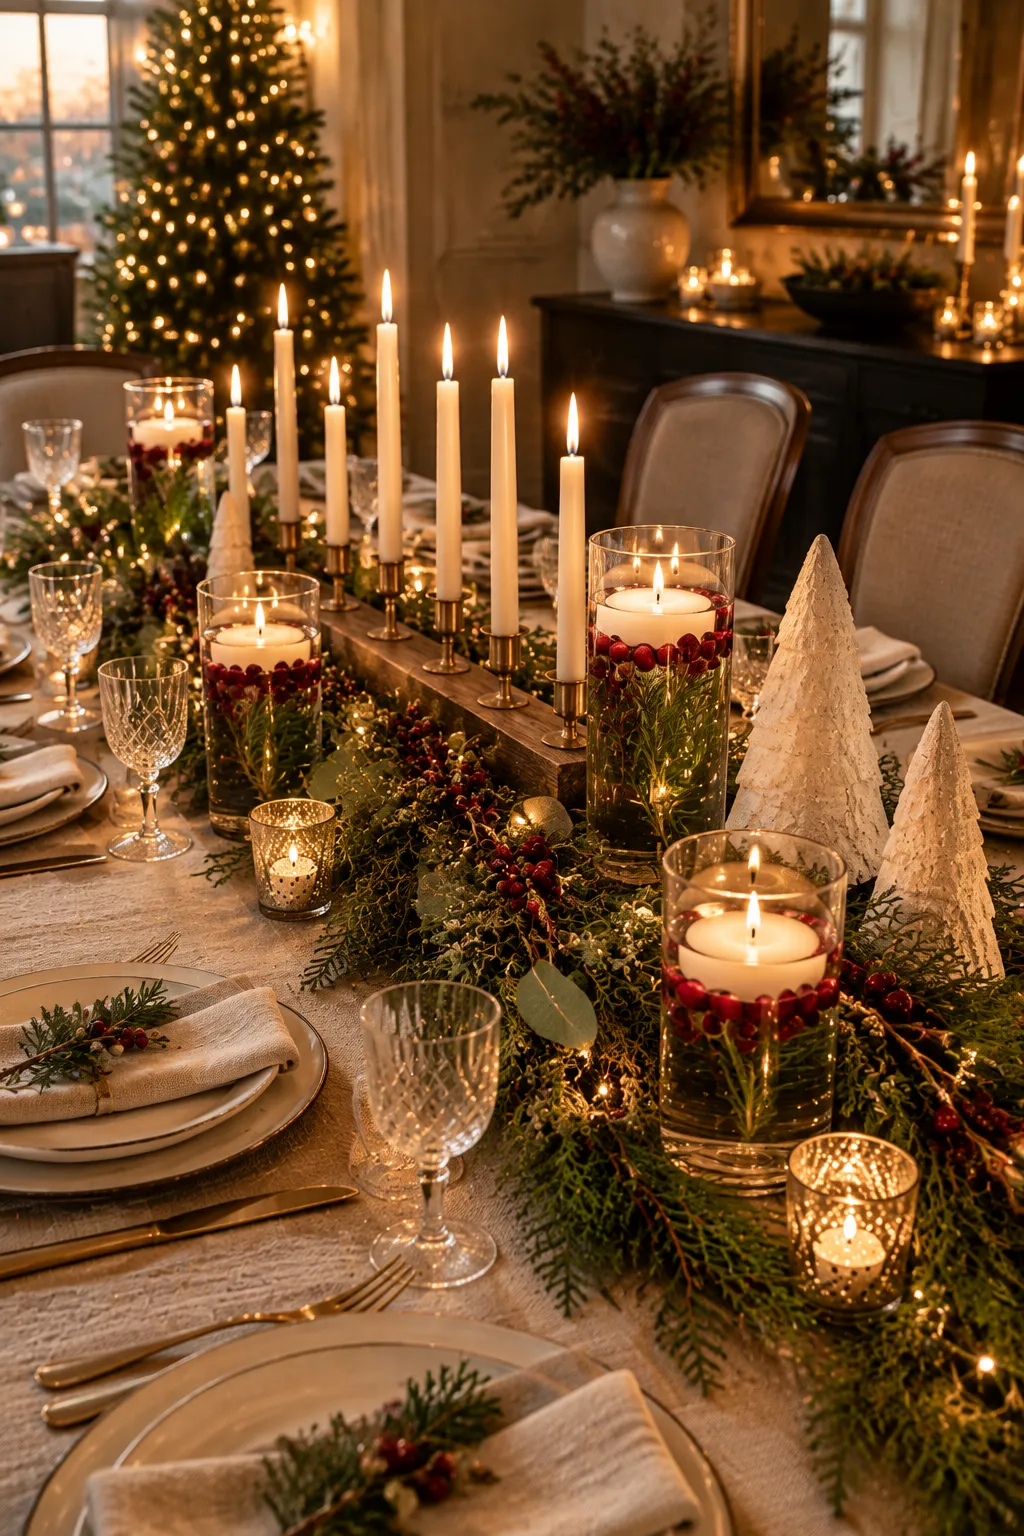

Some Christmas tables make you stop and reach for your phone. They usually have candlelight, a calm color palette and something real, like fresh greenery or fruit. None of that needs a designer price tag, and these DIY Christmas centerpieces prove it.
These DIY Christmas centerpieces borrow the looks you see in high-end showrooms and rebuild them at home. Every one is a full statement piece. I’ve kept the steps simple so you can actually make them, not just admire them.
What Makes DIY Christmas Centerpieces Look Expensive
Before you start, a few small rules do most of the heavy lifting. Stick to two or three colors and repeat them. Group things in odd numbers and mix up the heights. Pick matte, frosted or natural finishes over shiny plastic. And always add real greenery and candlelight, because they make everything near them look richer.
A Bottle Brush Tree Forest on a Mirrored Tray
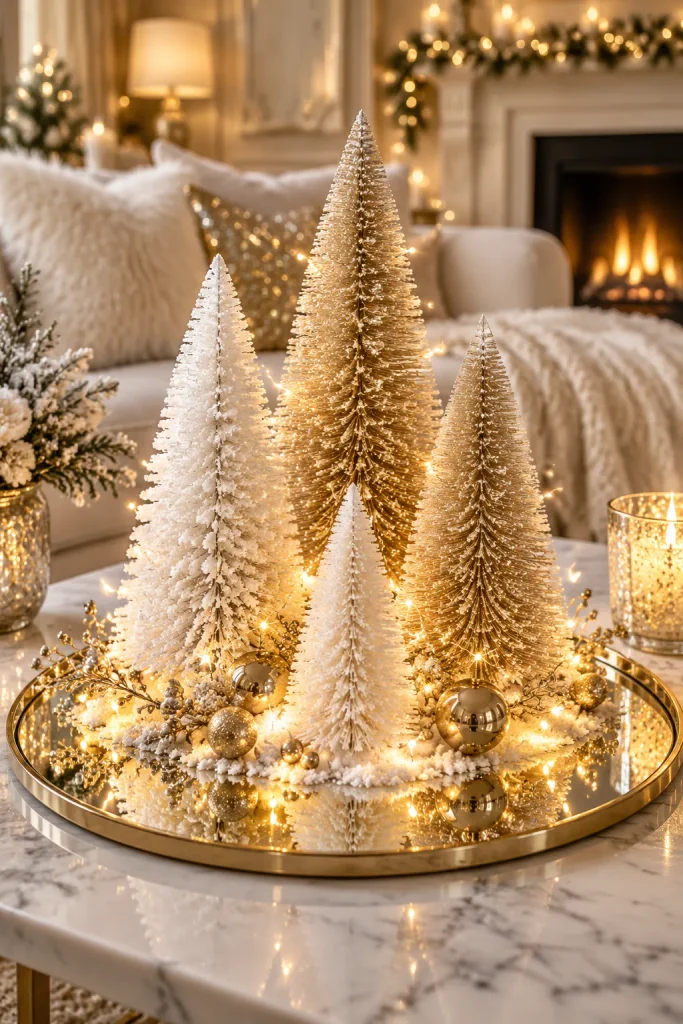
Bottle brush trees are a holiday classic, but the bright green ones can look a little craft-store. Soft cream, white and champagne trees feel far more modern. If yours are green, soak them in one part bleach and two parts water until they fade, then rinse and dry them overnight.
Grab four sizes and arrange them on a round mirrored tray, tallest at the back. Weave a strand of warm micro fairy lights between them and hide the wire under some faux snow. A few tiny gold beads scattered around the base add just enough sparkle.
The mirror is the secret here. It doubles every tree and every light, so the forest looks twice as full. At night it feels like a luxury shop window.
Floating Cranberry Candles in Tall Glass Cylinders
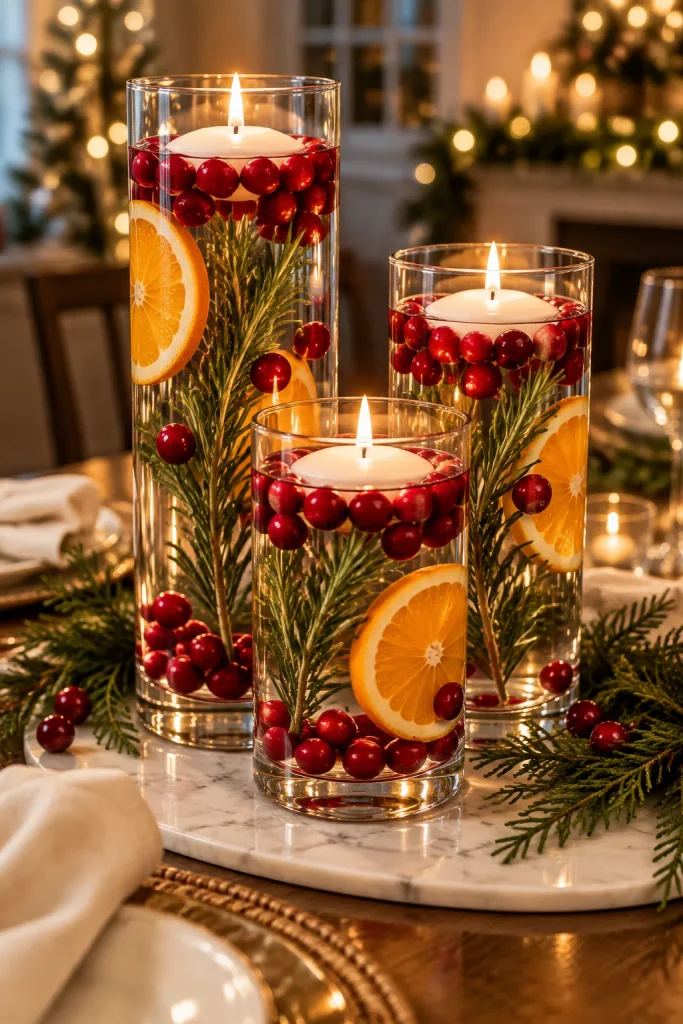
Height is what makes this one work. Short mason jars look sweet, but three tall glass cylinders look like a florist did them. Pick three different heights so they step down nicely.
Pop a handful of cranberries in the freezer the night before. Fill each vase about two-thirds with water and slide rosemary sprigs and thin orange slices against the glass. Drop in both fresh and frozen berries. The frozen ones sink and stay suspended, which gives you that layered look. Top up the water and float a white candle on each one.
Later in the evening, the candlelight sinks into the water and the berries glow ruby red. Set the trio on a marble board so it reads as one piece.
Plaster-Textured Cone Trees
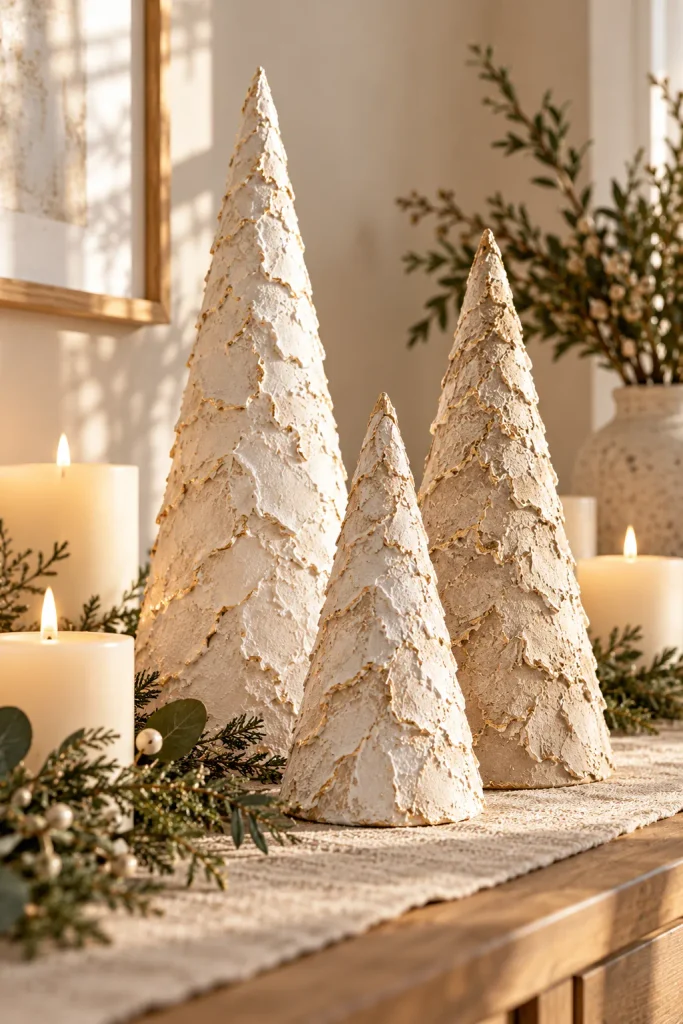
You’ve probably seen these chalky, stone-like trees in designer stores. They’re one of the easiest dupes on this list. All you really need is acrylic paint, baking soda and a cheap chip brush.
Mix white or stone-colored paint with baking soda until it’s as thick as frosting. Dab it onto foam or paper cones in three heights. Don’t smooth it out. The lumpy, uneven texture is exactly what makes them look hand-sculpted. A second coat adds depth, and a light swipe of gold over the raised bits gives a soft glint.
Style them with restraint. A linen runner, two or three white pillar candles and nothing else. That quiet, gallery feel is where the luxury comes from.
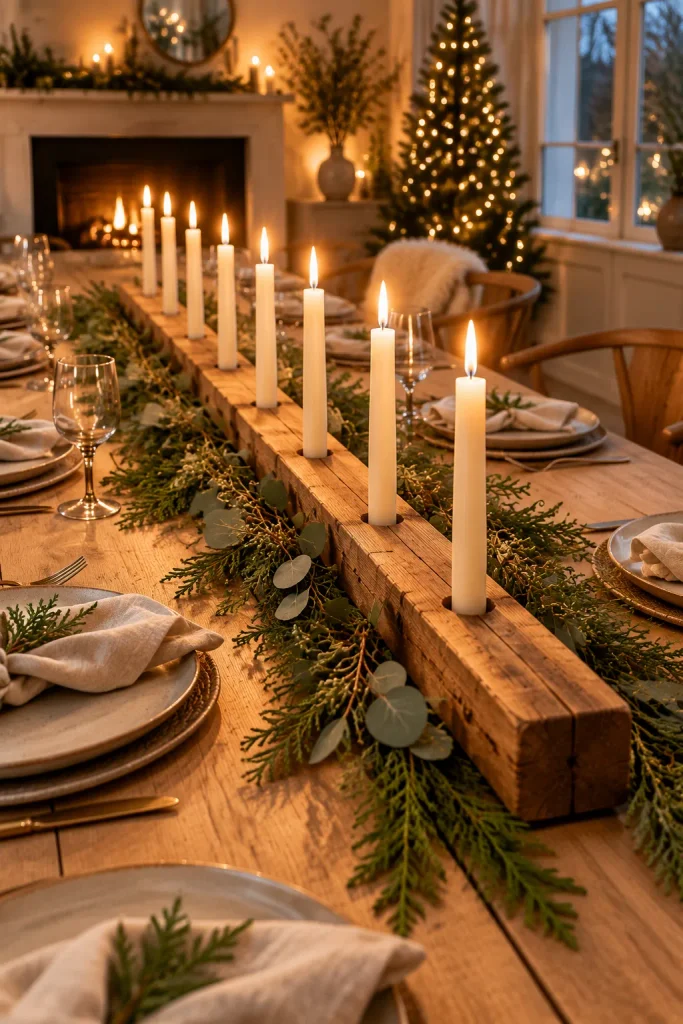
A Wooden Candle Beam
Picture a cozy Scandinavian cabin at dinnertime. There’s almost always a long wooden beam down the table with tall candles glowing in a row. You can make one in an afternoon.
Start with a chunky piece of wood, about three to four inches deep. Mark dots down the center roughly four inches apart. Drill each one about an inch deep with a 7/8-inch spade bit, which fits standard tapers. Sand everything smooth and rub in a little oil or stain to warm up the grain.
Push in your candles and scatter greenery loosely around the base. All-ivory tapers feel soft and warm, while black ones feel bold and graphic. When Christmas ends, just swap the greenery and keep it out all winter.
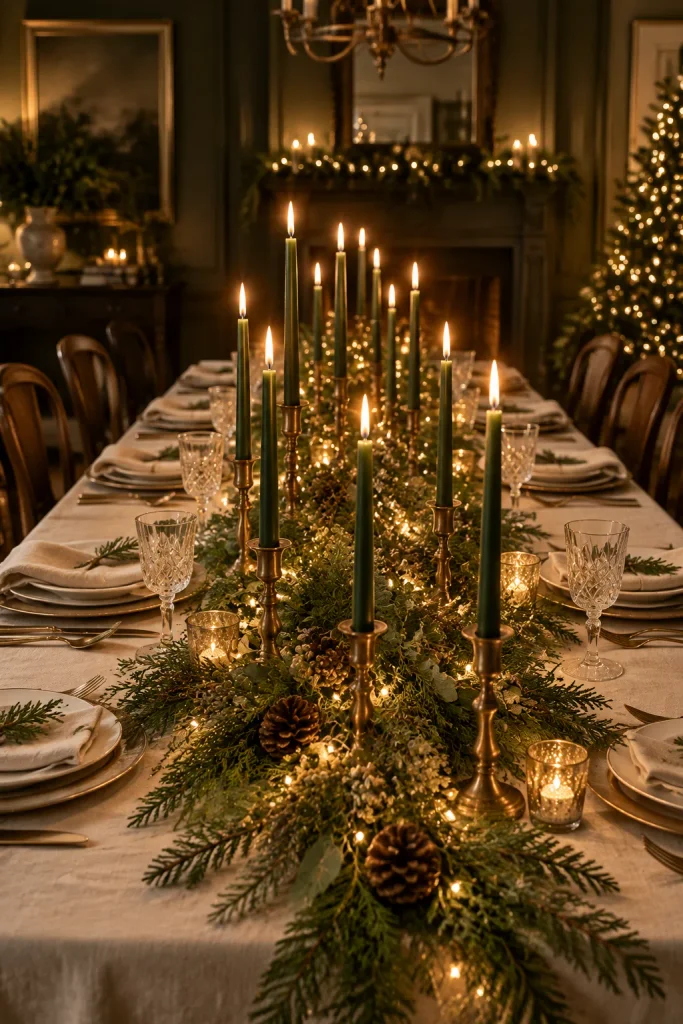
A Garland Runner With Mismatched Brass Candlesticks
This is the centerpiece for a long table and a big dinner. Lay a full garland down the middle, fluff it out and wrap warm fairy lights through it. Then gather five to nine brass candlesticks in different shapes and heights. Thrift stores and vintage markets are full of them.
Place the tallest ones near the center and let them shrink toward the ends. Fill them all with tapers in the same color. That one rule pulls the mismatched brass together so it looks collected, not random. Ivory, forest green and deep wine red all look beautiful.
Light everything just before guests sit down. It looks like the opening scene of a holiday film.
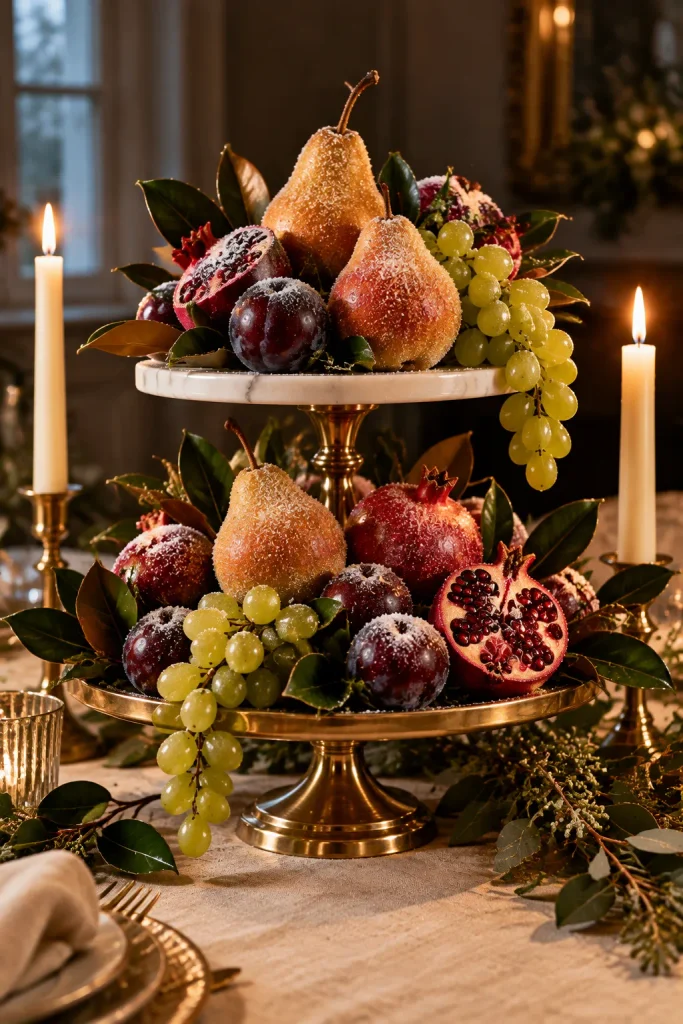
A Tiered Tower of Sugared Fruit
Frosted fruit piled high looks like an old still-life painting. It’s generous, festive and one of the few centerpieces people can actually eat. Pears, plums, pomegranates and small bunches of green grapes give you a lovely mix of shapes.
Brush each piece lightly with egg white or simple syrup and roll it in fine sugar. Leave it on a rack for about an hour to set. Stack a small cake stand on top of a larger one and pile the fruit on both tiers. Let the grapes spill over the edges and tuck glossy bay or magnolia leaves into the gaps.
Make it the day of your dinner so the sugar stays crisp. A tall candle on each side frames it perfectly.
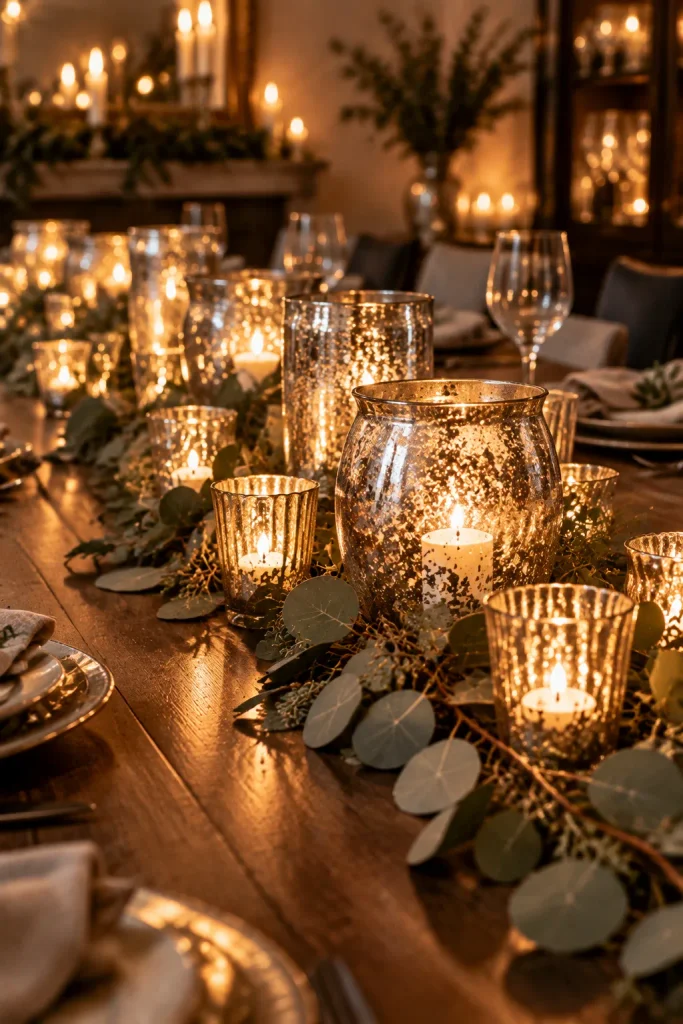
A DIY Mercury Glass Runner
Real antique mercury glass costs a small fortune. The good news is that the speckled, silvery finish is easy to copy with clear glass votives and a can of mirror-effect spray paint. A dozen of them glowing down the table looks truly glamorous.
Here’s the trick. Mist the inside of each glass with water and a splash of vinegar. Spray the mirror paint inside while it’s still wet, wait a minute, then blot gently with a paper towel. The water spots break up the paint into that aged, mottled look. Let them dry fully before adding tea lights.
Line them down the table in a loose, uneven row and weave eucalyptus around them. Every flame bounces off the silver. The whole table seems to shimmer.
Frozen Ice Lanterns With Greenery Inside
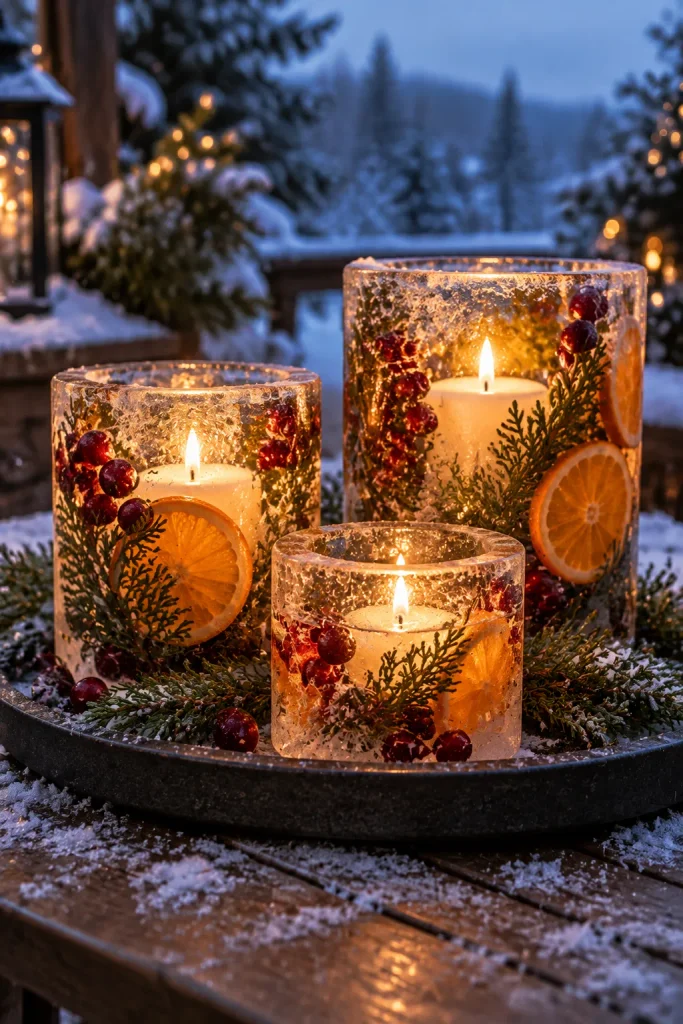
These feel like something from a snowy mountain resort. Each lantern is a block of clear ice with cedar, cranberries and orange slices frozen inside, glowing around a candle. They’re one of the most unexpected DIY Christmas centerpieces you can make, and they’re easier than they look.
You’ll use two plastic containers, one small enough to sit inside the other. Weigh the small one down with stones and tape it so it stays centered. Tuck your greenery, berries and citrus into the gap, fill it with water and freeze overnight. To release it, pour warm water into the center and run a little over the outside.
Set a candle inside and place the lanterns on a deep tray, since they’ll slowly melt indoors. If your winters are cold, put them on a porch or patio table instead. They’ll last for hours out there.
An Ikebana-Inspired Winter Arrangement
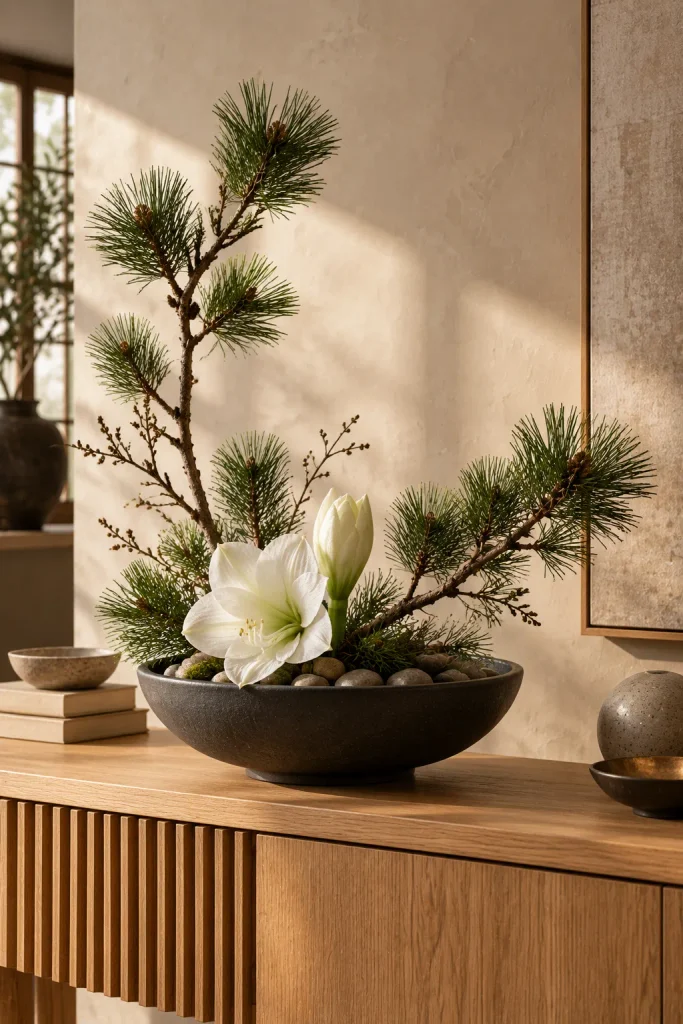
If you love clean, Japandi style, this one’s for you. Instead of a big bouquet, you use a few strong stems and lots of open space. The empty space is part of the design, so resist the urge to fill it.
Place a flower frog in a wide, shallow ceramic bowl and add water. Push in your tallest pine branch first, angled slightly back. It should stand about one and a half times as tall as the bowl is wide. Add a shorter branch leaning the other way, then set one white amaryllis or ranunculus low at the front. Cover the frog with smooth river stones.
It’s calm, artful and perfect for a console or small table. Pine holds up for weeks in water, too. Swap the bloom when it fades and the arrangement looks brand new.
A Champagne Bucket Overflowing With Winter Florals
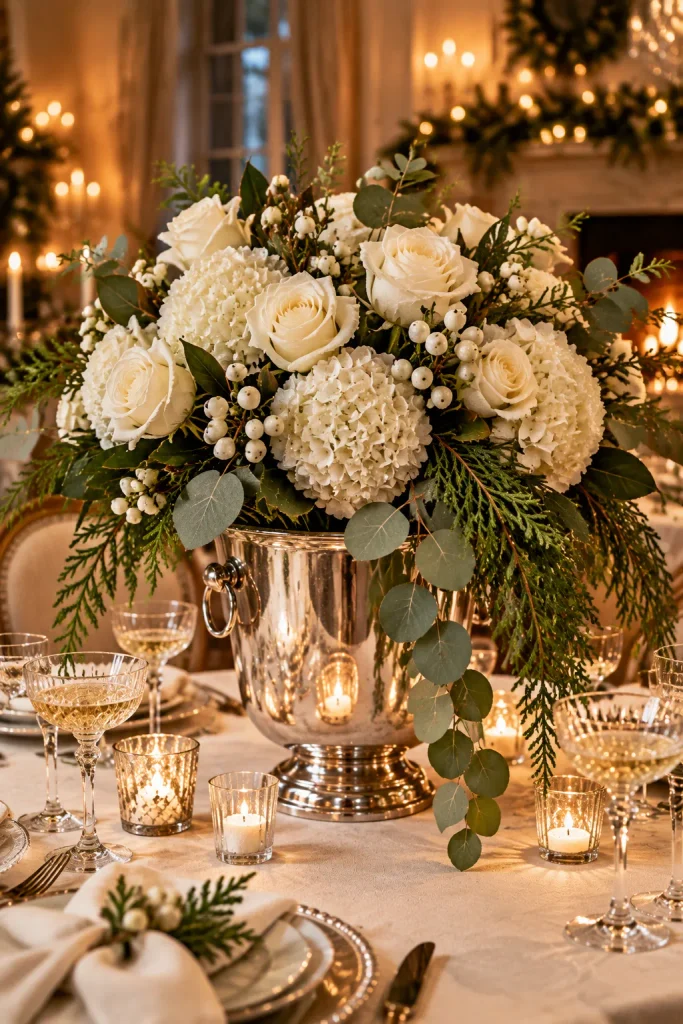
A silver champagne bucket already feels like a celebration. Fill it with white blooms and greenery and it becomes a showstopper. Thrift stores often have them tucked on the bottom shelf.
Slip a jar of water inside the bucket to hold the stems. Start with cedar and silver dollar eucalyptus, letting some pieces drape over the rim. Add white hydrangea for fullness, then tuck in white roses and berries at different heights. Grocery store flowers work beautifully once you trim the stems.
It’s lovely on a round dining table. Move it to a bar cart for New Year’s Eve and it works all over again. Keep the water topped up and the blooms will last about a week.
Potted Amaryllis in a Moss-Covered Planter
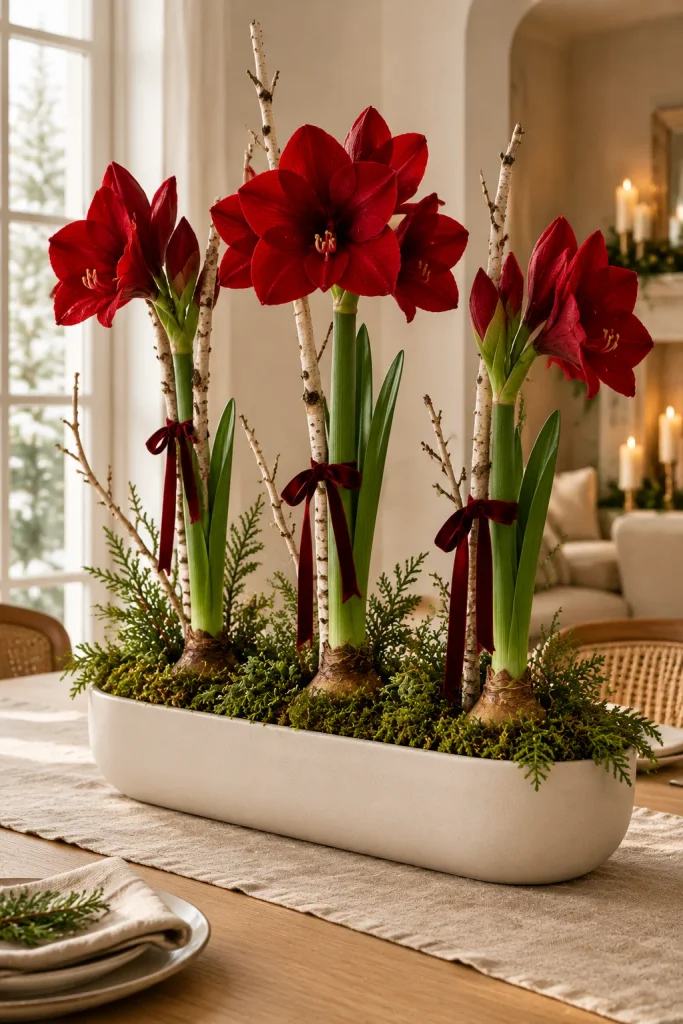
A living centerpiece feels special in a way cut flowers don’t. Tall amaryllis stems open slowly over the season, and each bloom is the size of your hand. Red looks classic, while white feels softer and more modern.
Timing matters with this one. Plant the bulbs six to eight weeks before Christmas in a long ceramic or wooden planter, leaving the top third of each bulb above the soil. Keep them somewhere bright and water lightly. Once the stems shoot up, cover the soil with moss and add thin birch branches for support. A loose ribbon tie keeps everything upright.
Short on time? Waxed amaryllis bulbs bloom with no soil or water at all. Just nestle them into moss in the planter.
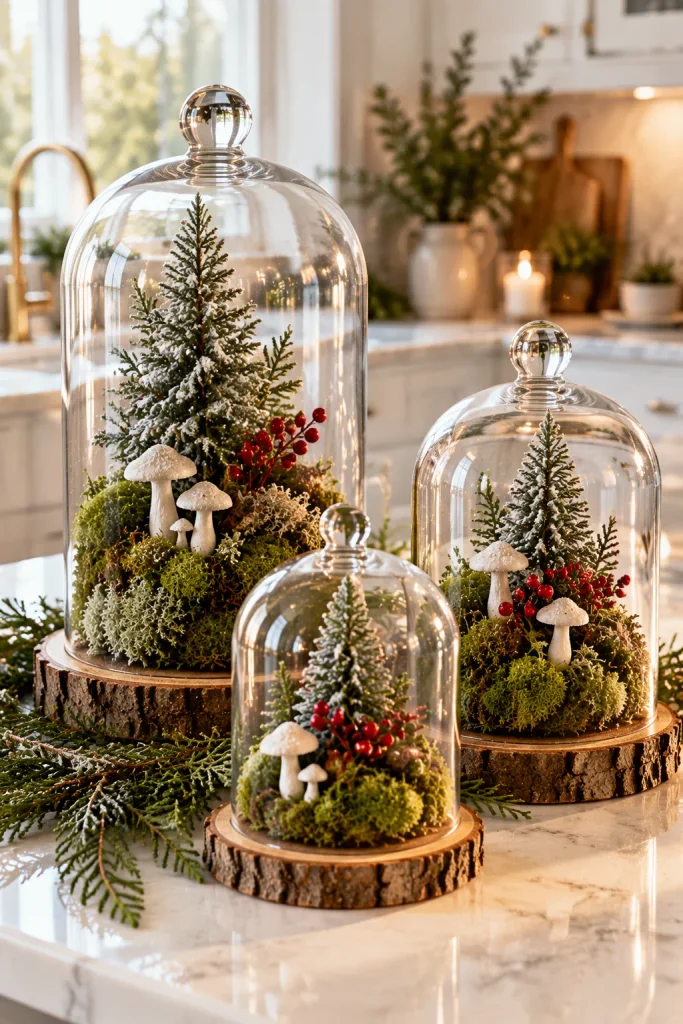
A Trio of Woodland Cloches
Put anything under glass and it suddenly feels precious. Three cloches in different heights, each with its own little moss scene, make a centerpiece people lean in to study. It’s earthy without tipping into rustic.
Glue a soft mound of preserved moss onto three wood slices. Give each one a single star piece: a mini evergreen in the tallest, a few small mushrooms in the middle and a sprig of berries in the smallest. Keep the extras minimal so each scene breathes. Cover them and group the three in a loose triangle.
They look especially good on a kitchen island where everyone gathers. Preserved moss lasts for years. Pack them away carefully and they’re ready to go next December.
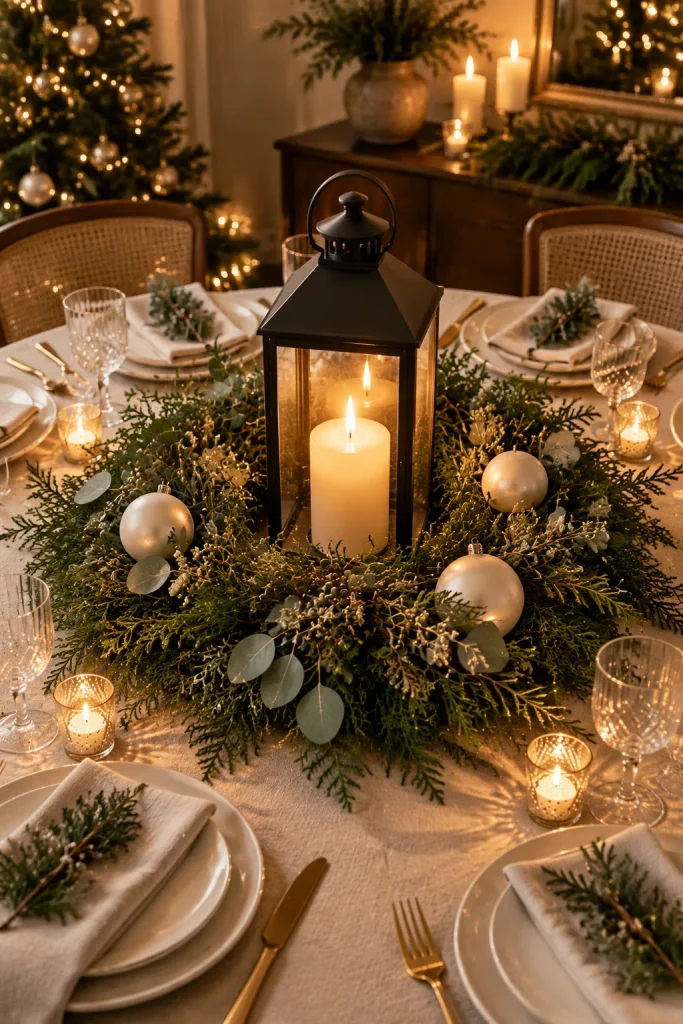
A Flat Wreath Around a Tall Lantern
Round tables are tricky because long runners never quite fit. The fix is surprisingly simple. Take a wreath off the door and lay it flat in the center.
Stand a tall black or brass lantern in the middle with a thick pillar candle inside. Silvery eucalyptus or soft cedar feels fresher and more current than classic fir. Tuck a few matte white ornaments into the greenery for a touch of sparkle. That’s it, and it takes about five minutes.
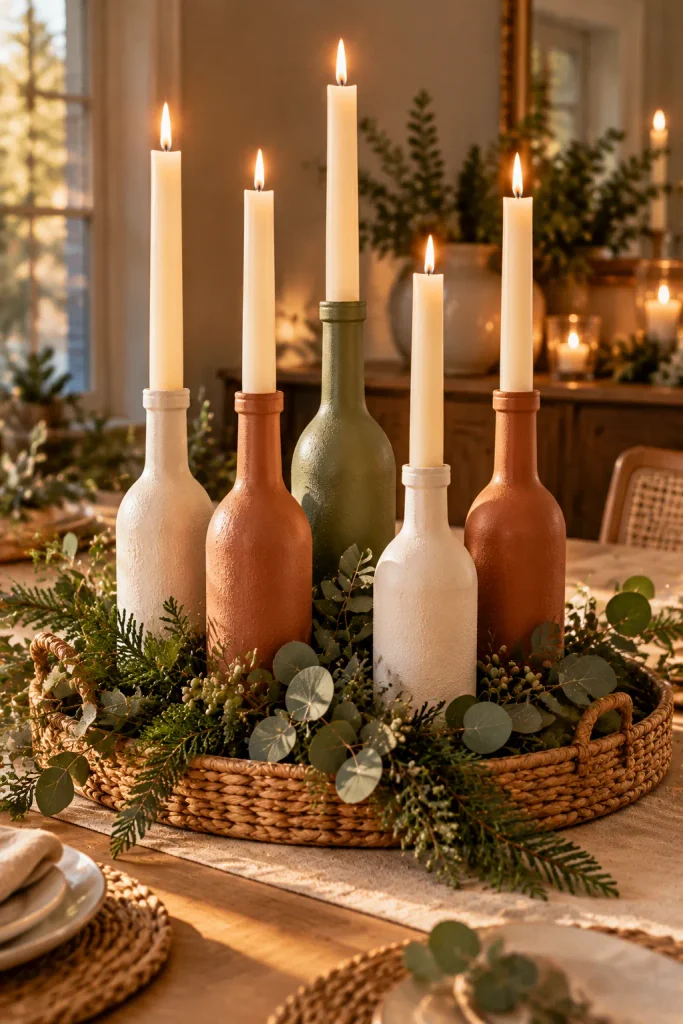
Painted Wine Bottles as Ceramic Candleholders
Empty wine bottles have a tall, graceful shape that’s easy to miss. Paint them in a matte, textured finish and they pass for studio ceramics. Guests rarely guess what they really are.
Soak off the labels in warm soapy water and let the bottles dry. Spray on a coat of primer, then two light coats of matte paint in white, sage or terracotta. A light mist of textured stone spray on top gives that handmade, earthy feel. Once dry, slide a taper candle into each neck.
Group three or five on a woven tray with greenery spilling around the base. The different bottle shapes give you natural height without any effort. It’s a quiet, earthy look that suits modern and organic homes.
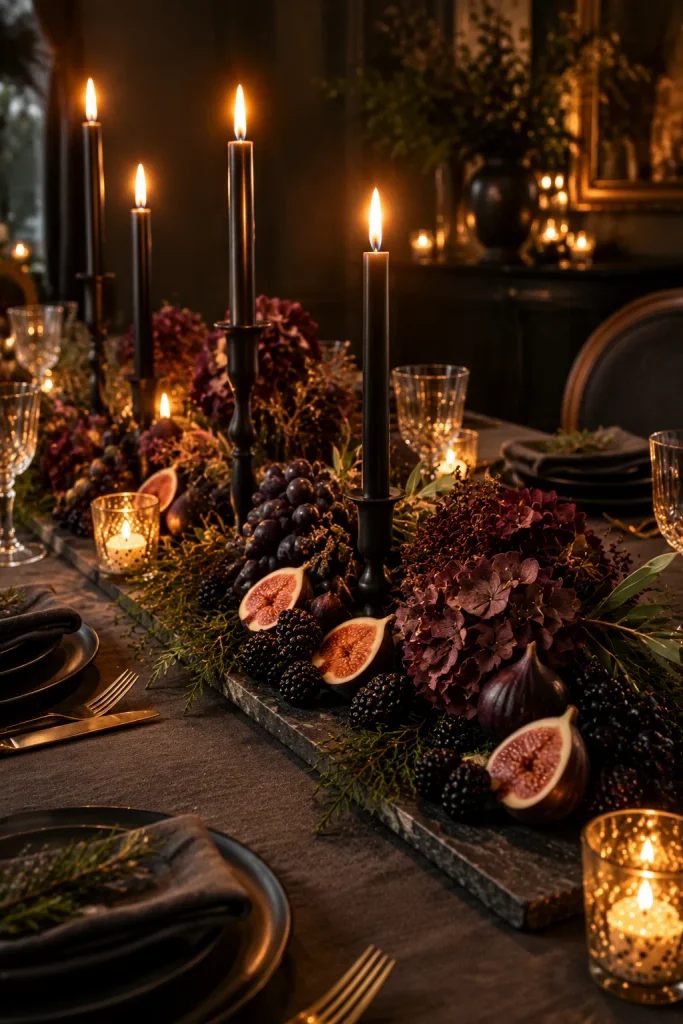
A Moody Fig and Dark Berry Board
Who said Christmas has to be red and green? For a late dinner, try deep plum, black and burgundy instead. It feels romantic and very of the moment.
Start with a long slate or dark wood board and lay down a few dark green leaves. Add bunches of dark grapes as your biggest shapes. Halve some figs and set them cut side up so the jammy centers show. Fill the gaps with blackberries and pieces of dried burgundy hydrangea. Finish with tall black tapers at each end.
Turn the overhead lights down when you serve dinner. By candlelight, the whole board glows like an old oil painting. It photographs beautifully, too.
Make It Yours This Year
The prettiest DIY Christmas centerpieces are rarely the most complicated ones. They have a clear color story, a little height and plenty of warm light. Pick the idea that fits your table, then add what you already love at home. Save this pin now so it’s waiting when the decorating mood hits.